
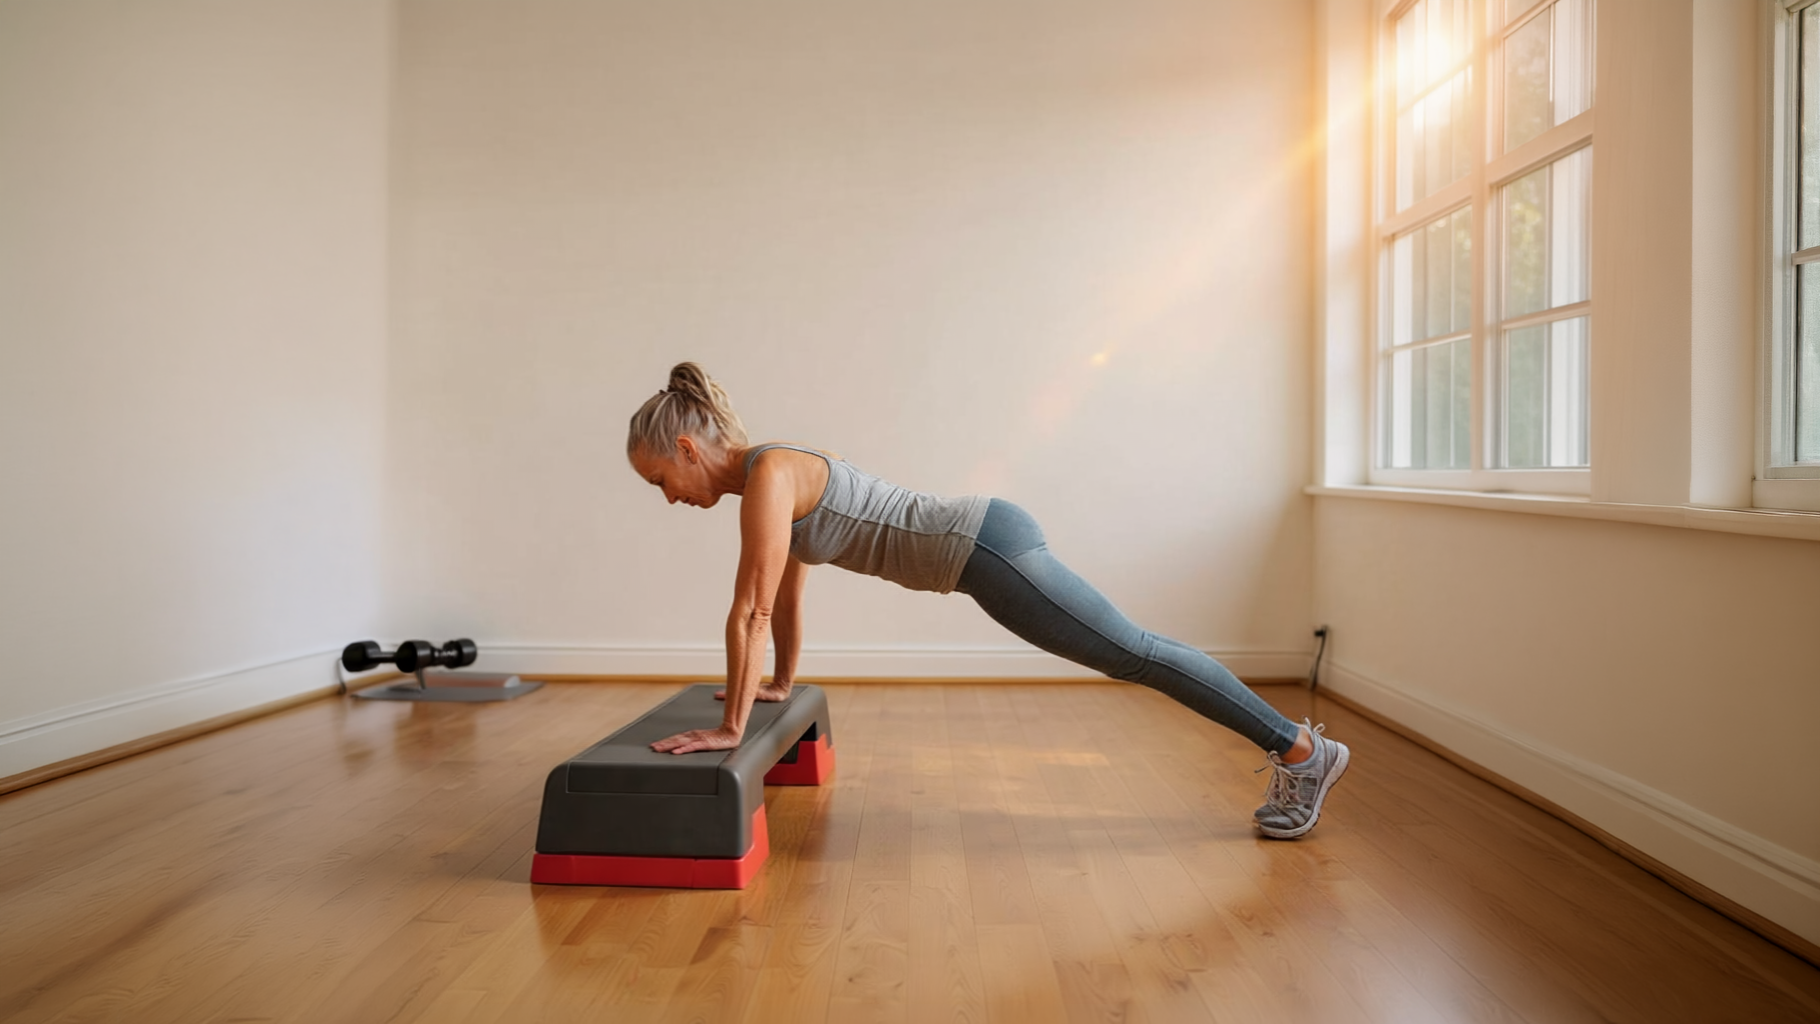
Push-up modifications for beginners are wall push-ups, incline push-ups, and negative push-ups. Start at the wall, then move to progressively lower surfaces — a counter, a desk, a bench, a step — as your reps get easier. Negative push-ups let you add training volume once you can do a few full reps but not a complete set.
By Deb Simpson, NASM Certified Personal Trainer — Deb coaches women over 40 who are building strength from the ground up.
- Why Knee Push-Ups Aren’t the Answer
- Wall Push-Ups
- Incline Push-Ups
- When to Progress Your Push-Up
- Negative Push-Ups
- Frequently Asked Questions
If you’re of a certain age (almost 50 over here), just getting down into a push-up position can feel like the workout. The actual push-up part seems ambitious from down there. If you feel seen right now, it’s because as a trainer, I have to acknowledge that push-ups are hard and we were never taught how to train for them. That’s not a personal failing. It’s a curriculum gap.
Here’s what most women were taught when a push-up wasn’t happening: go to your knees. PE class, every workout plan, and most of what you’ll find on Instagram and TikTok — same answer every time. They even had a name for it. “Girl push-ups.”
Why Knee Push-Ups Aren’t the Answer
A push-up looks like an upper body exercise. Chest, shoulders, arms — that’s what you see when you watch someone do one. That’s accurate, but it’s not the whole picture.
The hidden requirement is that your entire body has to hold a straight line from your shoulders to your ankles for the duration of every rep. On your hands, arms extended. That’s a high plank. And holding a high plank while your upper body is doing work is a significant core demand that nobody mentions when they hand you a push-up modification.
The problem with knee push-ups isn’t that they’re too easy. It’s that they’ve been handed to women for decades as though they’re the same exercise with the training wheels on. They’re not. Take away the straight line from shoulders to ankles and you’ve taken away the high plank — which means you’ve taken away the core requirement entirely. What’s left is a chest and tricep exercise. Useful in its own right, but not a push-up. And not a great path to get to one.
The incline is the right modification because it doesn’t remove the high plank — it just reduces how much load your core has to manage. The core is still in the exercise. The straight line is still there. The pattern is identical to a floor push-up, just at an angle that makes it doable while your strength catches up.
A runner doesn’t train for a race by cycling. A soccer player doesn’t practice by swimming. You train the thing you’re trying to get better at. Handing women a modification that removes half the exercise and calling it equivalent is, as the kids say, sus.
If you’d rather have someone else pick the right modification and manage the progression instead of guessing which surface comes next, that’s what Featherweight Fitness is for. I’m an NASM-certified trainer doing virtual personal training with women over 40 — push-up progressions, form checks, and a plan built from wherever you’re starting.
Wall Push-Ups
The best place to start is a wall and a full-length mirror. Position the mirror so you can see a side view of your body while facing the wall — a corner of the room usually works.
Put your hands against the wall and step your feet back to form a slight angle. Hands at shoulder height, slightly outside your shoulders, feet shoulder-width apart, weight resting lightly on your palms.
Give yourself a quick mirror check. You’re looking for a straight line — shoulders, hips, ankles aligned, which means your spine is aligned too. Brace your abdomen by tightening it like someone’s about to poke you in the belly. The goal is to see what that line looks like in position so you know what “right” feels like before you start working.


The cue is to push the wall away from you, not move toward it. When your nose gets close to the wall, your weight travels from your palms into your chest, shoulders, and arms. As you lower, your upper back muscles engage to help catch you — and they work harder right at the bottom of the rep than they did on the way down. Push back up to the starting position. It’s okay to watch yourself in the mirror while you get the hang of the movement — go slow and work to feel each part of the exercise.
If the angle you’ve chosen at the wall feels good, forget watching yourself and try a set of 10. If you could have kept going, you’re ready to move to a lower incline on the wall or a completely different surface.
Incline Push-Ups
At some point, and it may even be your first session, the wall you used to get your position dialed in and do your first reps won’t be enough resistance. Luckily, moving to a lower surface is as simple as looking around your living space. The surfaces are right in front of you — a kitchen counter, a desk, a bookshelf, a table, a plyo box or a tall step stool, then the first or second step of a staircase or a low step stool. You’re really looking for whatever is low enough to make 10 reps challenging, but not impossible. Make sure whatever surface you’re using is stable and on a non-slip surface before you put weight on it.

As the surface gets lower, the angle of your body drops, and the movement gets a little harder. You’ll feel both systems working harder together — upper body and core, not separately. The brace that felt easy at the wall becomes something you have to work to actively maintain as your push-up angle decreases. If your hips start to drop or your spine loses the line mid-set, that’s technical failure — and reaching it means you’ve genuinely worked the set. Rest for a beat, reset the position, and finish the last reps.
If two sessions go by without gaining reps at a certain angle, that’s a plateau — your reps have stalled. Raise the incline and increase your reps to 15-20. Once you can consistently hit 20 reps at the higher surface, come back to the lower angle. You can also speed up your core’s strength by adding direct core work alongside the push-ups — planks, dead bugs, anything that trains the brace in isolation. This core and balance workout is beginner-appropriate and pairs directly with wherever you are in the progression. The plateau isn’t a wall, it’s simply diagnostic; your core is telling you it needs more direct work before it can handle the next step down.
If you’d rather have someone else handle the programming while you focus on showing up and doing the work, that’s what Featherweight Fitness is for. I work with women building strength from the ground up — push-ups, core, and balance built together from wherever you’re starting.
When to Progress Your Push-Up
Anyone who knows me knows I like simple and efficient. So let me give you a simple and efficient rule to progress any exercise, not just push-ups, at any weight, for any lifter. A lot of fitness influencers will show you 12 micro-variations of the same movement because content is critical in that space. That has its place for some people, but for most, following a simple and efficient system for progression beats fancy and complex every time.
First session at a new surface
Do a set of 10. 8 or more reps with good form — stay here, and build toward more reps next session. 7 or fewer — finish the set at a higher surface, then try again next session.
Not gaining reps after two sessions
Raise the incline and build your reps toward 20 at the easier surface. Add direct core work alongside — planks, dead bugs, anything that trains the brace. Once you’re hitting 20 consistently, come back down.
Ready to drop to the next surface
12 to 15 reps across all three sets without form breakdown — drop to the next surface. Your reps tell you when, not the calendar. Keep moving down until the surface running out is the floor.
Negative Push-Ups
At some point you’ll get your first few floor push-ups — maybe 4 or 5 — and then run out of steam. Up to now, you’ve either done knee push-ups to finish, which just isn’t the same exercise, or done the rest of the reps at an incline. Push-up negatives give you another option.
Start at the mirror and get into a high plank position, with your hands under and just outside the shoulders. Check the mirror and confirm that you’re in a straight line from shoulders to ankles and that your core is braced like you’re about to get poked in the tummy. The goal is to see and feel the right position at the same time before you start moving.

Once you’ve found your position, face straight ahead and lower yourself to the floor as slowly as you can — three to five seconds, rest for 3-5 seconds if you need it, then reset back to the plank. That’s one rep. The slow descent sends a clear message to your body: things are only getting harder from here, so lock in.
Both the incline and the negative solve the same problem from different angles. The incline reduces the load for an entire set. The negative keeps you on the floor and lets you bank volume in pieces, even before you can string together a full set of standard reps. Neither one is a downgrade — they’re tools. Use whichever one gets you closer to the next full set.
Push-ups are a skill like any other. You wouldn’t expect to be good at a new hobby on day one — that defeats the purpose of learning it. Push-ups take the same thing any skill takes: practice and a strategy for getting better. The wall, the incline, the negatives — that’s the strategy. None of it is a workaround. It’s just how skills get built.
Rome wasn’t built in a day, and there are a lot of roads that lead to it. The only things that don’t work are waiting until tomorrow to start and being inconsistent once you do.
If you want someone to build the plan and manage the progression while you focus on showing up, Featherweight Fitness is where to start.
Frequently Asked Questions
What’s the difference between a wall push-up and an incline push-up?
They’re the same movement at different angles. The wall is the highest incline — least load on your core. A counter, bench, or plyo box is a lower incline — more load. The mechanics don’t change. The straight line, the hand position, the brace — identical at every surface. The angle is the only variable.
How do I know if my form is breaking down?
Your hips drop and your spine loses the straight line. It usually happens mid-set when the core fatigues before the upper body does. If you’re near a mirror, you’ll see it. If you’re not, you’ll feel it. That’s the signal to rest, reset the position, and finish the remaining reps.
How often should I practice push-up modifications?
Two to three times a week is enough to make consistent progress. Daily practice doesn’t give your muscles time to recover and adapt — and the adaptation is the point. Show up consistently, progress the incline when your reps tell you to, and the results follow.
What if my wrists hurt during push-ups?
Check your hand position first — hands should be directly under and slightly outside the shoulders, weight distributed across the whole palm, not loaded into the heel of the hand. If wrist pain persists, push-up handles keep the wrist in a neutral position and take the pressure off the joint entirely.
How long should I stay at each modification level?
Your reps tell you, not the calendar. When you can hit 12 to 15 reps across all three sets without form breakdown, it’s time to drop to the next surface. If two sessions go by without gaining reps, raise the incline and add direct core work. Progress is the signal, not the date.
Keep Exploring
- Want the case for why push-ups matter before diving into modifications? Push-Ups for Beginners: What They Actually Do and How to Start — the benefits and the core-strength piece this progression is built on.
- Core giving out before your arms do? Building Balance and Core Strength — Start Here — pairs directly with wherever you are in the push-up progression.
- New to strength training entirely? Beginner Strength Guide — the full roadmap to build from.